

Are you ready to dive into the wonderful world of garter stitch knitting? Garter stitch is a fundamental technique that every knitting enthusiast should have in their repertoire. In this comprehensive guide, we’ll take you through the ins and outs of garter stitch, from its basic characteristics to advanced techniques that will help you become a garter stitch pro. Let’s get started!
Garter Stitch
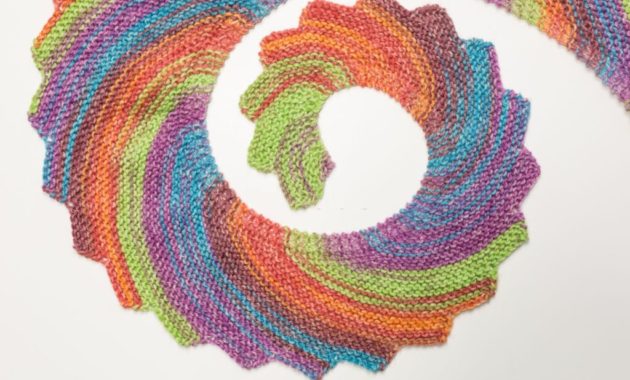
Garter stitch is a classic and versatile knitting pattern that features rows of alternating knit stitches on both sides of the fabric. This creates a textured, bumpy surface that is not only visually appealing but also incredibly cozy. The beauty of garter stitch lies in its simplicity – all you need to know is how to knit! Its reversible nature makes it perfect for scarves, blankets, and accessories where both sides are visible.
Getting Started with Garter Stitch
Before you embark on your garter stitch journey, gather the essential tools and materials. You’ll need knitting needles appropriate for your chosen yarn weight and a ball of yarn in your preferred color. Yarn selection is crucial for achieving the desired texture and drape in your garter stitch project. Remember to consider the gauge to ensure your project turns out as planned.
Knitting Garter Stitch: Step-by-Step Guide
To start knitting garter stitch, cast on the required number of stitches using your preferred method. Once your stitches are cast on, it’s time to dive into the knit stitch. Insert the needle into the first stitch from front to back, then wrap the yarn around the needle and pull it through to create a new loop. Continue knitting every stitch in this manner, row after row, until you’ve achieved the desired length. This creates the classic garter stitch texture on both sides of your work.
Garter stitch is one of the most basic and versatile stitches in knitting. Although it’s simple to execute, mastering the garter stitch can make a significant difference in the appearance and quality of your work. Here are some expert knitting tips and techniques to master the garter stitch:
the Basics:
Structure: Garter stitch is created by knitting every row (in flat knitting). If working in the round, you’ll alternate between knitting and purling each row.
Tension Matters:
Consistent Tension: Ensure that you maintain an even tension throughout your work. This will give your garter stitch a consistent texture and appearance.
Stretching: Garter stitch is stretchy. When measuring a piece, make sure to lay it flat without stretching to get accurate measurements.
Edges and Selvedges:
Slip the First Stitch: To achieve a neater edge, especially if you plan on seaming pieces together, consider slipping the first stitch of every row purlwise with the yarn in front.
Garter Stitch Selvedge: If you need a stable edge for sewing, consider adding a garter stitch selvedge (1-3 stitches on either edge) to stockinette or other stitch patterns.
Joining New Yarn:
Avoid Knots: Instead of knotting the new yarn to the old, simply leave a tail and start knitting with the new yarn. Weave in the ends later.
Join at the Edge: If possible, join the new yarn at the edge of the work to make weaving in ends neater and less noticeable.
Counting Rows:
Counting Ridges: In garter stitch, two rows make one ridge. When counting your rows, you can count the ridges and multiply by two.
Fixing Mistakes:
Dropping Stitches: If you drop a stitch, use a crochet hook to pick it up from the front and work it back up to the current row.
Tinking (Un-knitting): If you’ve just made a mistake, you can ‘tink’ (knit spelled backwards) or un-knit your work stitch by stitch to the point of the error.
Blocking:
Wet Blocking: This is particularly useful for garter stitch projects to give them a clean, finished look. Soak your finished piece in lukewarm water with a bit of mild soap, gently squeeze out excess water, pin to shape on a blocking mat, and let it dry.
Combining with Other Stitches:
Texture Play: Garter stitch can be beautifully paired with other stitches like stockinette or ribbing to create textural contrast in a project.
Practice!:
Start with Simple Projects: Begin with scarves, dishcloths, or coasters to practice your garter stitch and gradually move to more complex patterns.
Experiment with Yarns:
Varied Results: Different yarns will give different textures and appearances in garter stitch. Try everything from smooth cotton to textured wool to fuzzy alpacas to see what appeals to you the most.
Remember, the key to mastering any knitting technique, including the garter stitch, is practice. The more you knit, the more familiar you become with the nuances of the stitch and the more consistent your tension and stitch quality will be. Enjoy the process!
Mastering Even Tension
Maintaining consistent tension is crucial when working with garter stitch. Uneven tension can lead to uneven rows and an unbalanced finished project. To ensure an even tension, focus on keeping your yarn tension steady and using the same amount of force for each stitch. Regular practice will help you develop a natural rhythm that leads to beautifully uniform garter stitch fabric.
In the next part of our guide, we’ll explore exciting garter stitch variations and how to add a splash of color to your projects. Stay tuned for expert tips that will elevate your garter stitch knitting to the next level! “Delve into the intricacies of the garter stitch with our comprehensive guide. From mastering the basics to advanced techniques, become a knitting maestro in no time!””From first loop to finishing touch, ‘Mastering Garter Stitch’ offers expert knitting techniques. Elevate your craft and create stunning, textured patterns with ease.”

Passionate about all things craft-related, I am a dedicated and creative craft blogger with a knack for turning ordinary materials into extraordinary masterpieces.